
3 Quick Steps For Better Printing

Have you ever wondered how your designs get printed on apparel items? The answer is simple: DTG printing!
Knowing how to optimize your artwork before you even create or upload it can make all the difference in print quality, sales, and fan/customer loyalty. We’ve put together a list of 3 of the most common file issues with DTG printing and ways to avoid them! Check it out:
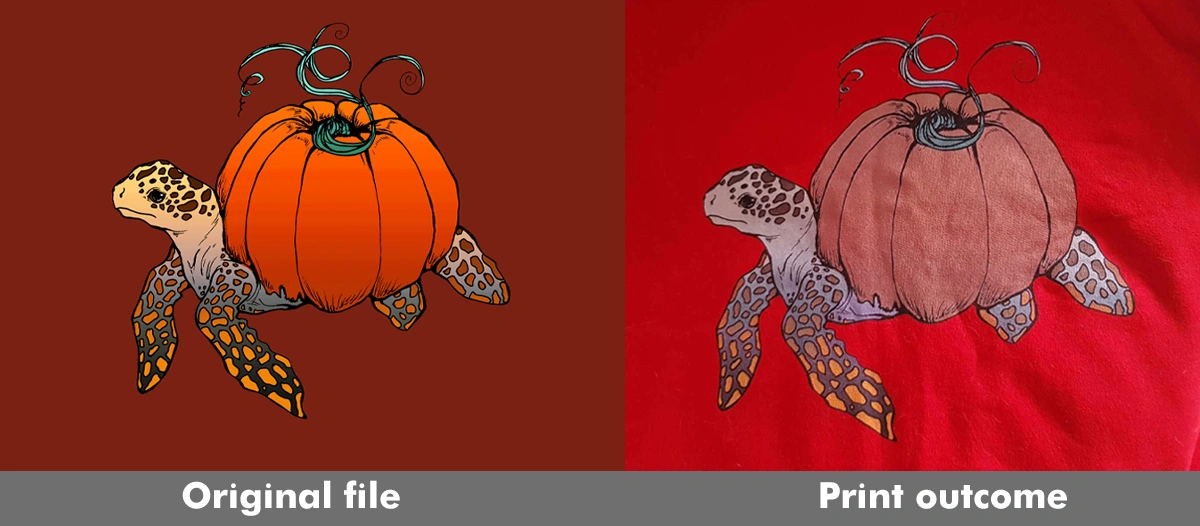
1. Saturated colors
Most often, your design should print as it appears in the mockup previews. However, transferring artwork from screen to print cannot reproduce highly saturated/neon shades as the color format changes from RGB to CMYK, which has a more limited color range. In fact, these shades may appear slightly duller or more muted once printed.
To avoid any surprises, make sure to use slightly muted colors in your designs. If your design is already saturated, turning down the saturation by around 20-30% should significantly improve the outcome and let those colors truly pop! If your design is already saturated, turning down the saturation to around 20-30% should significantly improve the outcome and let those colors truly pop!
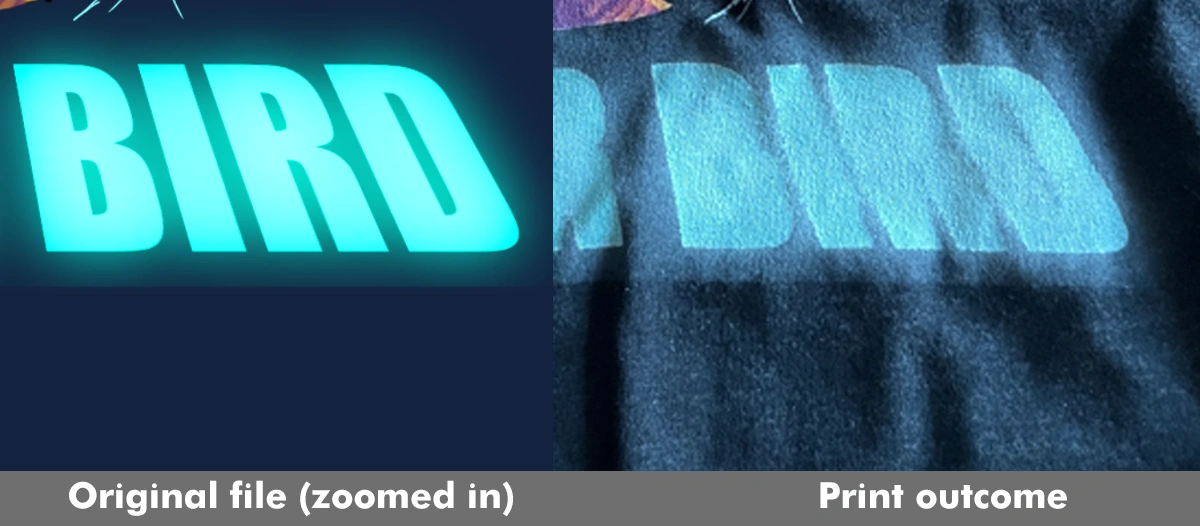
2. Glow effects
A very cool effect lots of designers use is outer glow. However, this makes things a bit tricky for dark garments, which need a white underbase in order to make the design show through on the fabric. If your design contains partial transparency, this can cause cloudy areas to show up when printed. To prevent this, we recommend converting your outer glow effects to halftones.
Curious about how to achieve that? This awesome guide to halftones from Redbubble has got you covered!
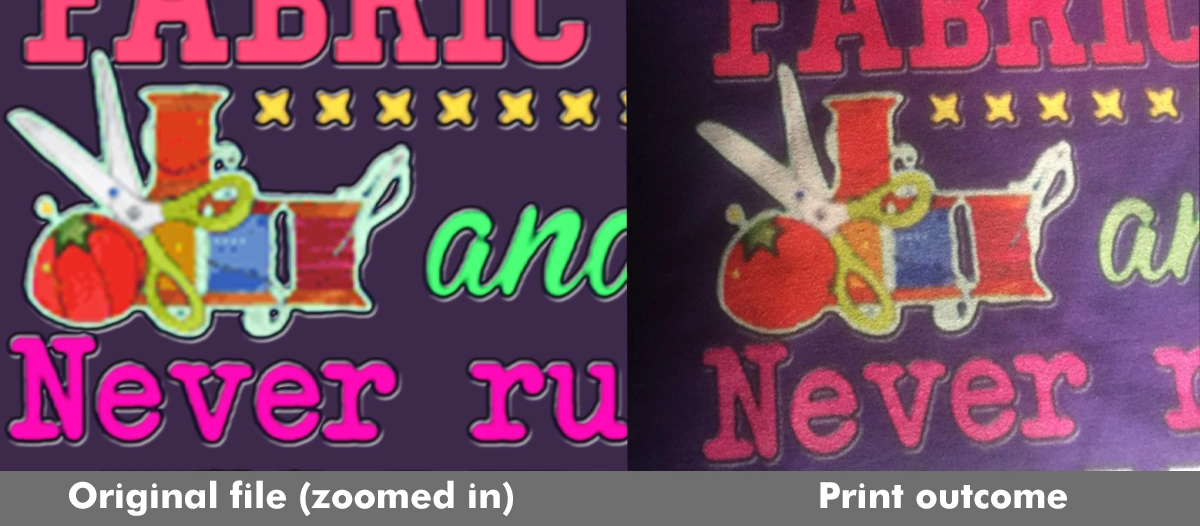
3. Low resolution
Last, but definitely not least, you should be mindful of the resolution of your files! The file requirements are:
"A high-resolution transparent .PNG at 150 DPI. Minimum dimensions of at least 1500px by 1995px (not including outer transparent pixels).
To enable all products, your file must be at least 5000px by 5500px."
The guidelines above will ensure that your design prints well no matter the product, orientation, placement, or scaling. Of course, the bigger, the better!
But wait! There’s more! The quality of your file matters, too. Resizing a file that is blurry or pixelated to begin with will only make the blurry or pixelated elements larger. Make sure all the elements of your design are as sharp and clear as possible from the start.
That just about covers it! If you have any other questions of your own or are looking to take designing to the next level, feel free to check out our design guide or email us at [email protected]! We're more than happy to help :)
--
Happy creating!


